Paint Correction Examples
These examples of our paint correction work will help you better understand severity and steps to correct.
Customer Preferences Determine the Level of Paint Correction
Everyone’s different when it comes to paint correction. For some, a quick one-step to clean it up suffices, while others demand close to perfection in removing defects. We made this page so that by seeing examples, you can get an idea of the severity of your paint defects, and the lengths you want to go to remove some or all of them.
We wish it were as simple as using a 0-10 rating, but it’s not that simple. There are many factors to consider when doing a paint correction. We ask questions to learn as much as possible about the vehicle’s history, how it’s used, how it’s maintained, and what your expectations are.
We prefer to see your vehicle in person so that we can do a visual inspection and take paint depth readings to see what we have to work with. But if that’s not possible, you can use this information to do a self-assessment of your vehicle’s paint.
Paint Thickness
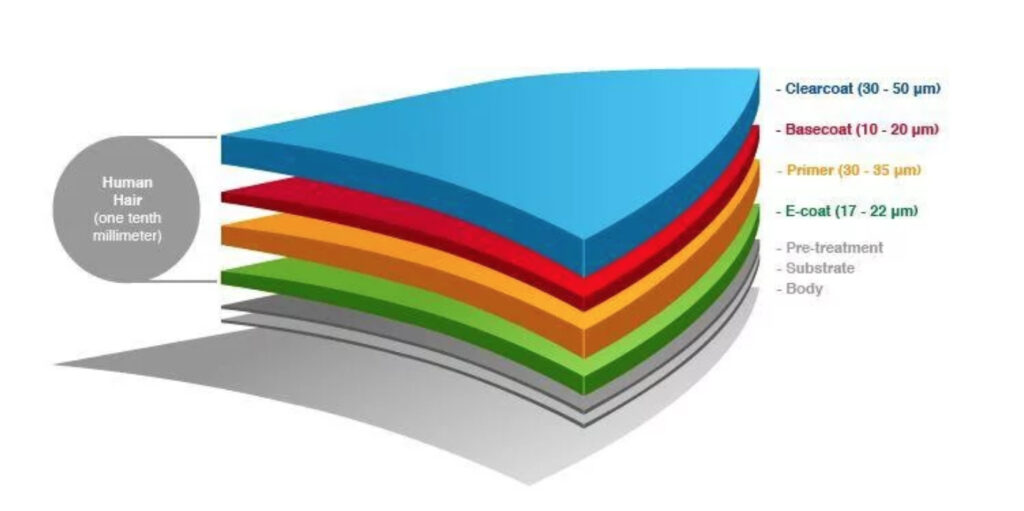
It’s important that you understand how paint thickness is measured. It’s unit of measure is “microns”, or 1/1,000,000,000 of a meter. Most of today’s vehicles have an average of 125 microns of primer, color coat, and clear coat. To put that into perspective: a dollar bill is about 109 microns thick. So the paint on your vehicle is marginally thicker than a dollar bill.
The clear coat is between 3-50 microns, or about the width of a single strand of human hair. You can easily deduce that there’s not much protecting your color coat from abuse, UV oxidation, water spots, swirls, scratches, chips, and environmental mishaps.
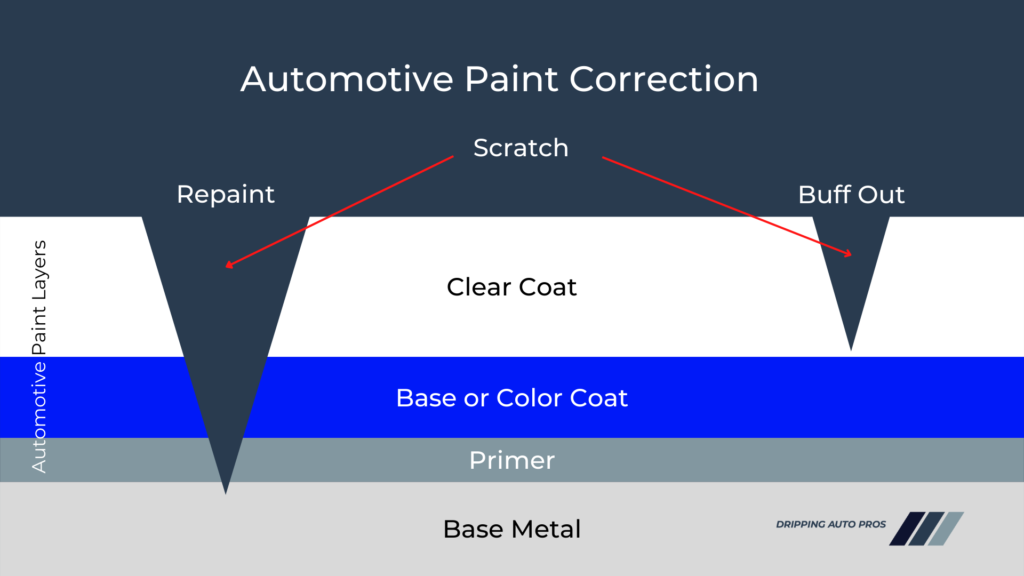
Paint correction work is done on the clear coat layer. Anything deeper than that requires paint. Paint correction removes defects by removing 1 – 2 microns of clear coat, kind of like filing your fingernails. The goal is to get the paint looking the way you want it to look without damaging the clear coat. If you are too agressive you can easily “burn” through the clear coat, and when that happens, a repaint job is required. For this reason you’ll hear us say: “Perfection is the enemy of good.”
One other factoid: Heat burns clear coats. The paint correction process generates lots of heat on the panel. The wrong pad, the wrong machine speed, the wrong hand speed, the wrong pressure, can result in burning your clear coat real quick. That’s why you want experienced and trained technicians doing the work. We are proud to show you our education and certifications in paint correction. It’s you assurance that your vehicle will be in safe hands.
Actual Client Vehicles
1 Step (single stage)
Single stage is most common on new vehicles, although we’ve actually seen new cars that required a 3 step paint correction. Do not assume that a new car or truck does not need paint correction – they all do. From the time your vehicle rolled off the assembly line, to the day you drove it off the lot, it suffered a lot of abuse. The protective cover used for transporting it was ripped off by someone in the shop and then washed with a brush. The result is a damaged clear coat before it hits the showroom floor. But the lighting in the showroom won’t show it.
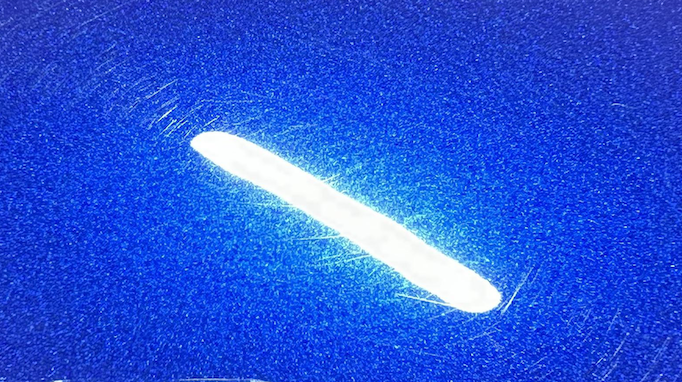
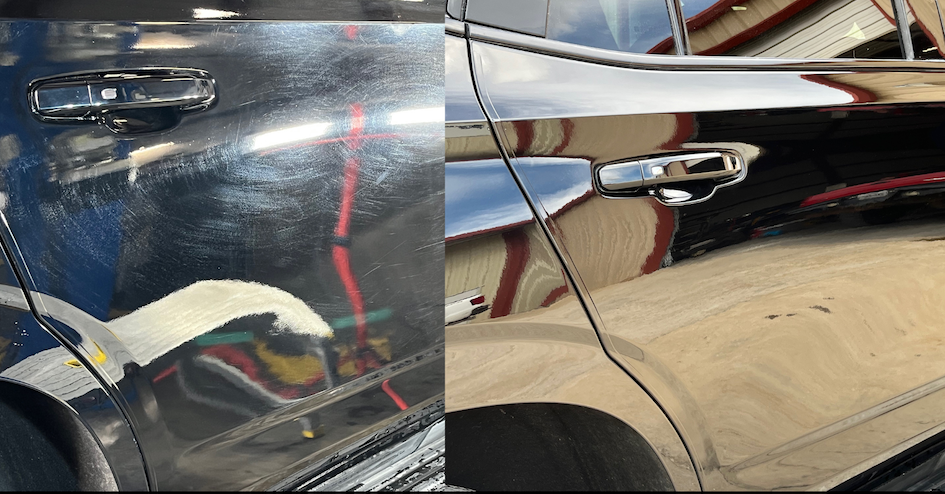
This picture is typical of what a new vehicle’s paint looks like, particularly on the fenders, doors, and rear quarter panels. Swirls like these come from improper washing and drying. It was most likely done by someone at the dealership who used a cheap car wash brush, with cheap soap, and a dirty drying towel.
A one step, or single stage, paint correction generally removes these. However, there are times when a 2 step paint correction is required. When we encounter swirls that cannot be corrected with a one step, we call you before we go further.
The other goal of a one step correction is to increase depth and clarity.
2 Step
A 2 stage involves a “cut” and a “polish”. The cut removes swirls and light scratches. It’s for vehicles with minor defects in the clear coat.
The goal is to remove 80% of the defects, so that the paint has depth and clarity and no noticeable defects. There may be random light scratches left, but the swirls will be a thing of the past.
A 2 step is most common for vehicles less than 5 years old, have not been abused by automatic car washes, and garage kept. Although, as previously stated, a new vehicle may require a 2 step correction.

3 Step
For older vehicles, or those that stay outdoors most of the time, and those that often go through automatic car washes, a 3 step paint correction is the solution. This involves:
- Heavy cut
- Fine or micro cut
- Polish
Moderate to heavy scratches that don’t require wet sanding are removed, as are the swirls. The goal is an 85% reduction in defects and
4 Step
For severely damaged clear coats, generally found in vehicles over 10 years old, a 4 step paint correction is the solution. This includes:
- Wet sanding (color sanding)
- Heavy cut
- Fine or micro cut
- Polish
Moderate to severe scratches can be removed provided they do not penetrate beyond the clear coat. The goal is an 85-90% reduction in defects and restoration of depth and clarity.
Special Cases
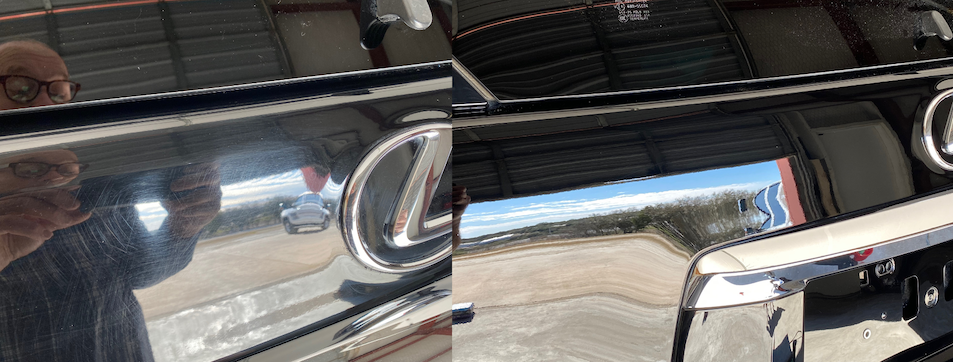
Water Spots
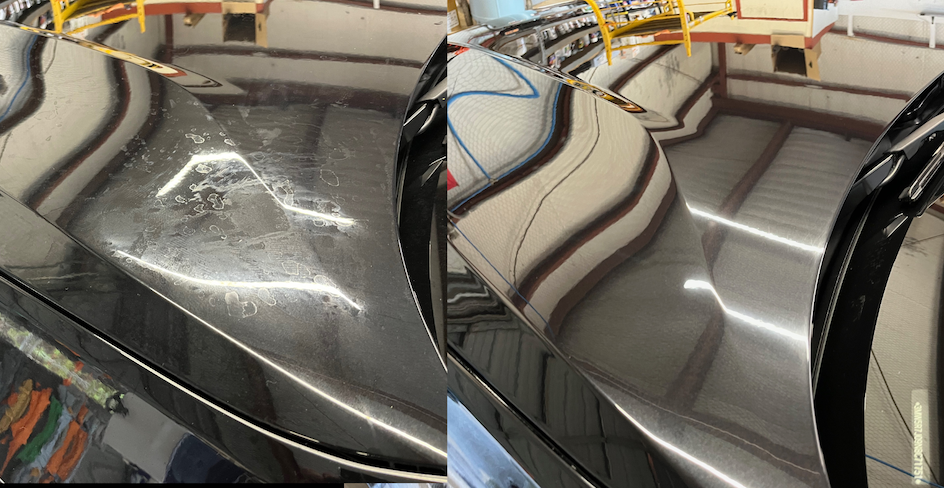
Water spots in Central Texas are insidious. If left too long on the vehicle, water spots will etch into the clear coat, and even damage the color coat. Even a traditional ceramic coating will not prevent etching.
This car required wet sanding to remove the water spots. We tried everything else and finally had to resort to the most drastic method, which we prefer to avoid if possible.
If we wet sand your vehicle, we insist on a protective coating to prevent premature oxidation. Think of having your skin exfoliated and then going outside without sunscreen. You get the picture.
Oxidation
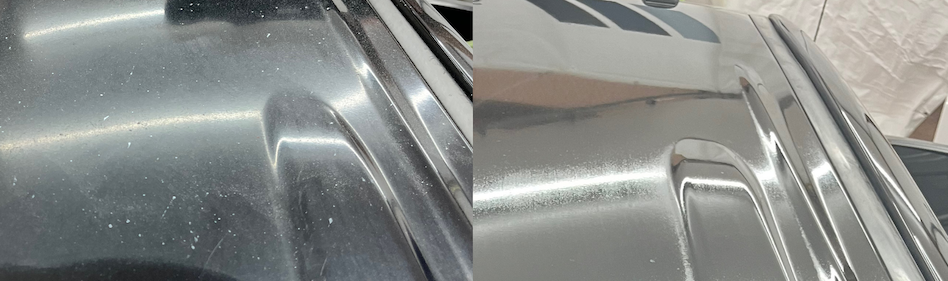
From the moment your vehicle left the factory, it started to oxidize. The Sun’s UV rays are no match for automotive clear coats. That’s why a protective coating is imperative.
Light oxidation can be removed with a 3 step correction, but when it gets severe and burns through to the color coat, it’s time to repaint.